RoofViews

Residential Roofing

The Benefits of Self-Adhered Roofing Systems for Low-Slope Roofs

By Annie Crawford

November 16, 2022

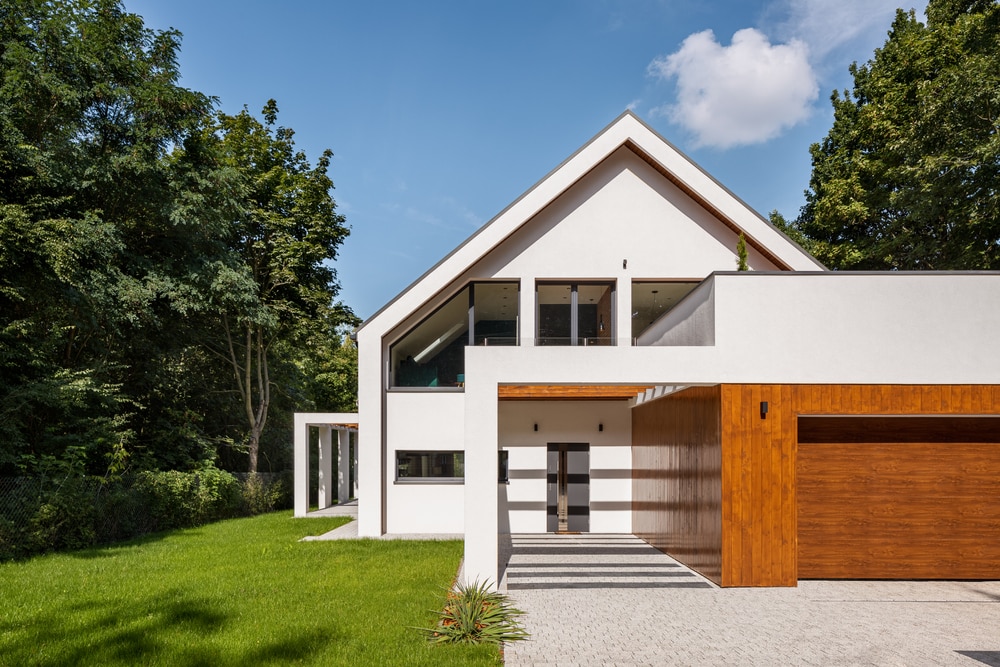
Two-story wood house with flat roof porch featuring cedar beams.

About 82% of homes in the United States have outdoor living areas—many with low-slope roofs. That's nearly 6 million homes that could feature a self-adhered roofing system. Are you taking advantage of the opportunities that these porches, sheds, garages, and carports represent?

The LIBERTY™ SBS Self-Adhering Roofing System is a residential low-slope roofing solution that can help boost your bottom line and help keep customers happy.

System Components

The LIBERTY™ SBS Self-Adhering Roofing System features the LIBERTY™ SBS Self-Adhering Base/Ply Sheet and the Liberty™ SBS Self-Adhering Cap Sheet.

Benefits for Customers

Contractors can help educate customers about the benefits of hiring a GAF-Certified Contractor to install the LIBERTY™ SBS Self-Adhering Roofing System on their low-slope roof.

When talking to a customer, explain how asphalt shingles aren't intended for low-slope roofs. In fact, installing shingles could lead to excess debris, pooling water, and an increased risk of leaks and water damage. When it comes to a mopped roof, explain the increased risks of the hot asphalt, and the unpleasant smell. Plus, you can point out that a LIBERTY™ SBS Self-Adhering Roofing System is typically quicker to install.

Clarify for customers which types of low-slope roofs could benefit from having a self-adhered roofing system — such as garages, sheds, patios, porches, carports, etc.

Customers will likely care about aesthetic benefits, too. The granule-surfaced modified-bitumen roofing system has an attractive, low-profile look and comes in seven popular colors that can help complement GAF Timberline® Shingles (among many others!) installed on their home.

Finally, you can explain that the Liberty™ SBS Self-Adhering Roofing System offers both 10 and 15-year warranties depending on the system that is installed. Click here for warranty details.

Benefits for Roofers

Roofers already have the know-how to install the LIBERTY™ SBS Self-Adhering Roofing System, but adding it to your roofing arsenal also comes with real perks, such as:

  1. Saving on setup and cleanup time compared with a typical mopped SBS roof system.
  2. Expanding your economic opportunities by offering an efficient, quality solution for low-slope roofs.
  3. Convenient installation with no torches, open flames, hot asphalt, bulky equipment, or messy solvent-based adhesives.
  4. Rising above the competition by offering an aesthetically pleasing low-slope solution.

Installation Best Practices

This self-adhered roofing system is a straightforward install—no difficult new techniques, just the roofing basics you've already mastered. Here are some best practices for installing the LIBERTY™ Self-Adhering Roofing System. Remember to always refer to full instructions for proper installation.

Remove Old Roof: Remove the existing roof(s) and inspect the roof deck to determine suitability for the LIBERTY™ Self-Adhering Roofing System. As always, confirm the decking is in sound shape before beginning this or any other roofing project, making sure any damaged deck materials are replaced as necessary.

Prep the Deck: Seal up any seams with roof deck tape (to provide added structural strength and waterproofing protection for your project) and prime the deck using the Matrix 307™ Asphalt Primer, LIBERTY™ Asphalt Primer, or equivalent ASTM-D41 Asphalt primer prior to installing the LIBERTY™ SBS Self-Adhering Base/Ply Sheet.

Cut the Base Sheet: Watch the online instructional video to learn the correct base sheet drip edge allowance, how to account for inside corner transitions, and how many inches to add for cant strips when installing the LIBERTY™ Self-Adhering Roofing System. (A password is required. If you're not already using the GAF Learning Portal, you can register to watch this video and other roofing-focused vocational training videos and courses here). Plus, learn how to stagger your base sheet seams to help prevent water and debris from gathering and to improve overall aesthetic outcomes. Pro-tip: lay out the material before starting the installation, so you can verify measurements and help with a smoother application. Note: For two-ply installations, LIBERTY™ SBS Self-Adhering Base/Ply Sheets are required.

Install the Base Sheet: The beauty of self-adhered durable membrane is that no nails are required (unless the slope is 1:12 or higher, then back-nailing in the selvage edge is required to prevent slippage). To create a strong bond and smooth surface when installing, roll with a weighted roller (~150 lb.) between each layer.

Attach the Metal Drip Edge: Before setting the metal drip edge, determine if you are installing a one or two-ply system. This will determine the location of the metal drip edge. Learn about correct nail type and penetration depth for metal drip edge installation in the video. Along with the knowledge gained from the instructional video, be sure to always follow local code on nail spacing.

Cut the Cap Sheet: Cut the LIBERTY™ SBS Self-Adhering Cap Sheet to a manageable length, and align at the lowest edge of the roof, overlapping and flush with the outer edge of the drip edge, with the selvage edge at the high side of the roof.

Install the Cap Sheet: Thankfully, installing the cap sheet is as easy as aligning, folding, peeling, and rolling. The LIBERTY™ SBS Self-Adhering Roofing System was made to simplify a roofer's life when it comes to residential low-slope roof applications. Watch the cap sheet install demonstration and get pro-tips about cap sheet priming, overlap allowance, end laps and T-joints, and more in the above video.

Grow and Connect with Fellow Roofing Professionals

Ready to build your business with expanded roofing products and know-how? Grow professionally with the GAF Learning Portal. Improve your hands-on skills, business expertise, and product knowledge—all while connecting with fellow roofing pros.
About the Author

Annie Crawford is a freelance writer in Oakland, CA, covering travel, style, and home improvement. Find more of her work at annielcrawford.com.

Related Articles

Dos techistas instalando un revestimiento de silicona para techos en un edificio comercial.
In Your Community

Ventajas de los revestimientos de silicona para techos

Como contratista comercial de construcción de techos, usted es responsable de elegir los materiales adecuados para cada trabajo. Con tantas opciones disponibles, tomar una decisión puede resultar una tarea difícil.Cada vez más, los profesionales del sector están optando por los revestimientos de silicona para techos por su fuerza y durabilidad. Este tipo de revestimientos sirve para extender la vida útil de un techo con una estructura firme y, posiblemente, para que los propietarios ahorren tiempo y dinero al retrasar la reparación completa del techo. Además, sus propiedades de restauración funcionan a la perfección con la mayoría de los sistemas comerciales de construcción de techos, como el EPDM, de fieltro, de betún y de metal.¿Qué son los revestimientos de silicona para techos?Los revestimientos de silicona son revestimientos de protección, alto rendimiento e impermeables para techos. Al agregar este revestimiento a un techo con una estructura firme, se puede extender la vida útil del techo existente. La silicona es un componente inorgánico, por lo que mantiene sus propiedades a la intemperie. A su vez, es un material flexible que puede absorber la mayor parte del movimiento normal de un techo a fin de evitar el agrietamiento y la pérdida de sus capacidades de protección.Beneficios de los revestimientos de silicona para techosAdemás de su flexibilidad y su capacidad para extender la vida útil del techo existente, los revestimientos de silicona ofrecen una serie de beneficios. Laura Soder, gerenta sénior de productos líquidos y revestimientos de GAF, explica que los revestimientos de silicona de GAF están diseñados para proteger el techo de filtraciones y ofrecer otras ventajas relacionadas.Protección contra rayos UVEl principal beneficio de los revestimientos de silicona es la protección contra los rayos ultravioleta (UV). "La fórmula de la silicona de GAF incluye dióxido de titanio, lo que ofrece una estabilidad excepcional contra los rayos UV y una reflectancia solar alta", afirma. Esta protección UV ayuda a reducir la temperatura del techo, lo que se traduce en un mejor funcionamiento de las unidades de techo.RentabilidadLos revestimientos de silicona son soluciones rentables que sirven para retrasar el costo de los materiales y la mano de obra necesarios para reemplazar el techo en su totalidad. Funcionan de manera excelente con la mayoría de los techos comerciales y se acoplan especialmente bien con los techos de metal.Restaura el techo existente y extiende su vida útilSoder señala que los revestimientos de silicona se adhieren bien a los techos de metal, lo que los convierte en una excelente opción para extender la vida útil de este tipo de techos. Antes de su aplicación, cepille el óxido ligero o trate específicamente las zonas con más óxido. "Hay muchos techos de metal instalados y, para aquellos que tienen una estructura firme y solo requieren una restauración moderada, se puede agregar con facilidad años de vida útil al techo al revestirlo con silicona", sostiene.Resistente a la humedadLos revestimientos de silicona también son conocidos por su capacidad de resistencia a la humedad. Como la silicona es inorgánica, resiste la degradación en zonas en las que el agua se acumula, lo que la convierte en una opción ideal para áreas con muchas lluvias o nieve.Funciona en climas calurosos y fríosLa silicona tiene un amplio rango de temperaturas en las que se puede aplicar. Al no contener agua, puede aplicarla en temperaturas más bajas que el acrílico y otros revestimientos de techo. Proporciona una capa de impermeabilización monolítica y sin fisuras por encima de los techos de metal existentes. Además, la silicona se contrae y expande junto con el metal en climas fríos y calurosos.En qué se diferencian los revestimientos de silicona de los revestimientos elastoméricosEn comparación con el acrílico y otros revestimientos elastoméricos para techos, la silicona tiene ciertas ventajas.Los acrílicos son revestimientos de protección a base de agua con resistencia a los UV, pero no deben instalarse en lugares donde se acumula el agua, ya que podrían romperse y comenzar a deslaminarse. La silicona es un material que se termina de curar con la humedad, lo que significa que reacciona con la humedad del aire y se seca hasta lograr una película.Soder explica que ambos materiales son flexibles y adecuados para su uso sobre el metal. Pero, si hay agua estancada, el acrílico no es la mejor opción. "Si bien la silicona es más costosa, en general, se degrada a un ritmo mucho más lento que otros revestimientos", sostiene. Ahora bien, una de las desventajas de la silicona en comparación con otros revestimientos elastoméricos para techos es que es resbaladiza cuando está mojada.Recorrido por la instalación y aplicaciónSi bien los revestimientos de silicona pueden extender la vida útil de un techo existente, Soder sostiene que es mejor instalar el revestimiento antes de que finalice la vida útil de la membrana existente.Como las filtraciones suelen ocurrir en las juntas de los techos, puede agregar sellador de silicona en esas zonas. La fórmula de los selladores difiere de la de los revestimientos: en la de los selladores se utilizan otros polímeros de silicona, lo que los vuelve más robustos y pesados. Los selladores de silicona están formulados para las zonas de mucha presión y pueden ayudar a absorber el movimiento en puntos críticos del techo. Funcionan junto a un revestimiento de silicona para la protección del techo.Antes de aplicar cualquier revestimiento, asegúrese de que el techo esté limpio, seco y firme. "Limpio significa libre de contaminantes, polvo, aceites, hojas y otros desechos", explica Soder. Puede usar el concentrado de limpieza de GAF para hidrolavar el techo.Como la silicona se termina de secar con la humedad, el techo debe estar seco antes de aplicarla. Revestir una superficie húmeda puede afectar la adhesión del material y es uno de los errores más grandes que puede cometer en el momento de la instalación. Queremos que el revestimiento comience el proceso de secado por la humedad del aire, no de la humedad en el techo.Cómo aplicar revestimientos de siliconaLa aplicación de un revestimiento de silicona para techos implica cinco pasos:Limpiar los desechos del techo y probar que el revestimiento se adhiera correctamente a la superficie.Asegurarse de que el techo esté firme. Reparar las láminas de metal rotas y reemplazar los sujetadores que falten o estén dañados.Tratar todas las juntas y sujetadores con sellador de silicona, como GAF Silicone Mastic. Se debe aplicar con un cepillo a un grosor de 60 milésimas de pulgada o 1/16 pulgadas mojado.Usar el mismo sellador en los bordes, entradas y drenajes.Por último, aplicar el revestimiento de silicona para techos a todo el techo. Algunos revestimientos, como GAF Unisil Silicone, requieren dos capas, mientras que otros, como GAF High Solids Silicone, necesita solo una.Entender las necesidades de mantenimiento y la durabilidadEl mantenimiento de un revestimiento de silicona para techo es fundamental. Abordar los problemas antes de que se vuelvan más difíciles ayuda a minimizar los costos de las reparaciones y maximizar la vida útil del revestimiento.Como el techo se contrae y expande con el tiempo, se pueden producir algunos problemas con las juntas. Una buena regla de oro es hacer inspeccionar el techo cada seis meses. Aplicar un sellador de silicona puede servir para tratar las zonas con filtraciones o grietas. El sellador de silicona es estable contra los rayos UV y no necesita una capa final, según Soder.Agregar revestimientos de silicona para techos a la caja de herramientasCon tantos beneficios, los revestimientos de silicona para techos deberían ser la primera opción en los proyectos de planificación de restauración del techo. Además, al tener tantas opciones disponibles, puede elegir el tipo que sea mejor para cada tipo de techo en el que trabaje. ¿Tiene más preguntas sobre los revestimientos para techos? Los representantes del servicio técnico de GAF estarán encantados de asistirle con su nuevo proyecto de revestimiento.

By Authors Mark Soto

November 19, 2024

Two roofers installing a silicone roof coating on a commercial building.
Commercial Roofing

The Advantages of Silicone Roof Coatings

As a commercial roofing contractor, you're responsible for choosing the right materials for each job. But with so many options available, making a decision can be difficult.Increasingly, industry professionals have been turning to silicone roof coatings for their strength and durability. These coatings can help extend the life of a structurally sound roof and potentially save property owners time and money by delaying a full reroof. Plus, their restoration properties work great with most commercial roofing systems, like EPDM, built-up, bitumen, and metal roofs. What Are Silicone Roof Coatings?Silicone coatings are high-performance, waterproof protective roof coatings. Adding this coating to a structurally sound roof can help extend the life of the existing roof. Silicone is inorganic, so it can maintain its properties in inclement weather conditions. It's also flexible and can absorb most normal roof movement to help avoid cracking and losing its protective features.Benefits of Silicone Roof CoatingsIn addition to flexibility and extending the life of the existing roof, silicone coatings offer several other benefits. Laura Soder, senior product manager for liquids and coatings at GAF, explains that GAF silicone coatings are designed to help protect against leaks and provide related advantages.UV Ray ProtectionThe major benefit of silicone coatings is ultraviolet (UV) ray protection. "GAF silicone is formulated with titanium dioxide, providing exceptional UV stability and high solar reflectance," she says. This UV protection can help lower roof top temperatures, which may translate into more efficient operation of roof top units.Cost-EffectiveSilicone coatings are cost-effective solutions that can help delay the cost of materials and labor needed to replace the entire roof. They work great with most commercial roofs and pair exceptionally well with metal roofs.Restores and Helps Extend the Life of the Existing RoofSoder notes that silicone coatings adhere well to metal roofs, making them an excellent way to extend the service life of metal roofs. Before application, brush away light rust or spot-treat heavier rust. "There are a lot of metal roofs out there, and for those that are structurally sound and require only moderate restoration, you can easily add years to the roof's life by coating them with silicone," she says.Moisture-ResistantSilicone coatings are also known for their moisture-resistant capabilities. Since silicone is inorganic, it resists degradation in areas that pond water, making it an ideal choice in areas that experience rain or snow.Works in Hot and Cold WeatherSilicone has a wide temperature application range. Because it doesn't contain water, you can apply it at lower temperatures than acrylic and other roof coatings. It provides a monolithic, seamless waterproofing layer over existing metal roofs. Silicone will also flex with metal in cold and hot weather.How Silicone Compares to Elastomeric CoatingsCompared to acrylic and other elastomeric roof coatings, silicone has some advantages.Acrylics are water-based protective coatings with UV resistance —but they shouldn't be installed where there is ponding water, as they can break down and start delaminating. Silicone is a moisture-cure material, meaning it reacts with moisture in the air and cures to a finished film.Soder explains that both materials are flexible and appropriate for use over metal. But if you have any standing water, acrylic isn't the best choice. "While silicone is more expensive, it typically weathers at a much slower rate than other coatings," she says. That said, one of silicone's drawbacks compared to other elastomeric roof coatings is that it's slippery when wet.Navigating Installation and ApplicationWhile silicone coatings can help extend the life of an existing roof, Soder notes it's best to install the coating before the end of the existing membrane's service life.Since leaks tend to happen at roof seams, add silicone sealant to these areas. Sealants are formulated differently than coatings—they use different silicone polymers, giving them a heavier body and stronger build. Silicone sealants are formulated for high-stress areas and can help absorb movement at critical points in the roof. They work hand in hand with a silicone coating to protect the roof.Before you apply any coating, ensure the roof is clean, dry, and sound. "Clean means free of contaminants, dust, oils, leaves, and other debris," Soder says. You can use GAF Cleaning Concentrate to power wash your roof.Since silicone is moisture-cure, the roof needs to be dry before applying. Coating over a wet surface can affect adhesion and is often one of the biggest mistakes you can make when installing. You want the coating to start the curing process from moisture in the air, not from moisture on the roof.How to Apply Silicone CoatingsApplying a silicone roof coating involves five steps:Clean any debris off the roof and test that the coating will properly adhere to the surface.Ensure the roof is in sound condition. Repair broken sheet metal, and replace missing or damaged fasteners.Treat all seams and fasteners with silicone sealant like GAF Silicone Mastic. Apply it at 60 mils or 1/16-inch wet thickness with a brush.Use the same sealant on any curbs, penetrations, and drains.Finally, apply the silicone roof coating to the entire roof. Some coatings, like GAF Unisil Silicone, require two coats, while others such as the GAF High Solids Silicone may need just one.Understanding Maintenance Needs and LongevityMaintaining a silicone roof coating is essential. Addressing issues before they become problematic can help minimize the cost of repairs and maximize the service life of the coating.As the roof flexes over time, issues with the seams might develop. A good rule of thumb is to get a roof inspected every six months. Applying a silicone sealant can help address areas with leaks or cracks. Silicone sealant is UV stable and doesn't require a top coat, according to Soder.Adding Silicone Roof Coatings to Your ToolboxWith many benefits, silicone roof coatings should be front of mind when planning roof restoration projects. And with several options available, you can choose the best type for each roof you work on. Have more questions about roof coatings? GAF technical service reps are more than happy to assist you on your next coating project.

By Authors Mark Soto

October 15, 2024

Installation of ISO Board and TPO on a Roof
Building Science

Roof Insulation: A Positive Investment to Reduce Total Carbon

Have you ever thought about building products reducing the carbon dioxide emissions caused by your building? When considered over their useful life, materials like insulation decrease total carbon emissions thanks to their performance benefits. Read on for an explanation of how this can work in your designs.What is Total Carbon?Total carbon captures the idea that the carbon impacts of buildings should be considered holistically across the building's entire life span and sometimes beyond. (In this context, "carbon" is shorthand for carbon dioxide (CO2) emissions.) Put simply, total carbon is calculated by adding a building's embodied carbon to its operational carbon.Total Carbon = Embodied Carbon + Operational CarbonWhat is Embodied Carbon?Embodied carbon is comprised of CO2 emissions from everything other than the operations phase of the building. This includes raw material supply, manufacturing, construction/installation, maintenance and repair, deconstruction/demolition, waste processing/disposal of building materials, and transport between each stage and the next. These embodied carbon phases are indicated by the gray CO2 clouds over the different sections of the life cycle in the image below.We often focus on "cradle-to-gate" embodied carbon because this is the simplest to calculate. "Cradle-to-gate" is the sum of carbon emissions from the energy consumed directly or indirectly to produce the construction materials used in a building. The "cradle to gate" approach neglects the remainder of the embodied carbon captured in the broader "cradle to grave" assessment, a more comprehensive view of a building's embodied carbon footprint.What is Operational Carbon?Operational carbon, on the other hand, is generated by energy used during a building's occupancy stage, by heating, cooling, and lighting systems; equipment and appliances; and other critical functions. This is the red CO2 cloud in the life-cycle graphic. It is larger than the gray CO2 clouds because, in most buildings, operational carbon is the largest contributor to total carbon.What is Carbon Dioxide Equivalent (CO2e)?Often, you will see the term CO2e used. According to the US Environmental Protection Agency (EPA), "CO2e is simply the combination of the pollutants that contribute to climate change adjusted using their global warming potential." In other words, it is a way to translate the effect of pollutants (e.g. methane, nitrous oxide) into the equivalent volume of CO2 that would have the same effect on the atmosphere.Today and the FutureToday, carbon from building operations (72%) is a much larger challenge than that from construction materials' embodied carbon (28%) (Architecture 2030, 2019). Projections into 2050 anticipate the operations/embodied carbon split will be closer to 50/50, but this hinges on building designs and renovations between now and 2050 making progress on improving building operations.Why Insulation?Insulation, and specifically continuous insulation on low-slope roofs, is especially relevant to the carbon discussion because, according to the Embodied Carbon 101: Envelope presentation by the Boston Society for Architecture: Insulation occupies the unique position at the intersection of embodied and operational carbon emissions for a building. Insulation is the only building material that directly offsets operational emissions. It can be said to pay back its embodied carbon debt with avoided emissions during the building's lifetime.A Thought Experiment on Reducing Total CarbonTo make progress on reducing the total carbon impact of buildings, it is best to start with the largest piece of today's pie, operational carbon. Within the range of choices made during building design and construction, not all selections have the same effect on operational carbon.When making decisions about carbon and energy reduction strategies, think about the problem as an "investment" rather than a "discretionary expense." Discretionary expenses are easier to reduce or eliminate by simply consuming less. In the example below, imagine you are flying to visit your client's building. Consider this a "discretionary expense." The input on the far left is a given number of kilograms of carbon dioxide equivalent (CO2e) generated for the flight, from the manufacturing of the airplane, to the fuel it burns, to its maintenance. The output is the flight itself, which creates CO2 emissions, but no durable good. In this case, the only CO2 reduction strategy you can make is to make fewer or shorter flights, perhaps by consolidating visits, employing a local designer of record, or visiting the building virtually whenever possible. Now consider the wallpaper you might specify for your client's building. It involves a discretionary expenditure of CO2e, in this case, used to produce a durable good. However, this durable good is a product without use-phase benefits. In other words, it cannot help to save energy during the operational phase of the building. It has other aesthetic and durability benefits, but no operational benefits to offset the CO2 emissions generated to create it. Your choices here are expanded over the previous example of an airplane flight. You can limit CO2 by choosing a product with a long useful life. You can also apply the three Rs: reduce the quantity of new product used, reuse existing material when possible, and recycle product scraps at installation and the rest at the end of its lifespan. In the final step in our thought experiment, consider the insulation in your client's building. As before, we must generate a certain amount of CO2e to create a durable good. In this case, it's one with use-phase benefits. Insulation can reduce operational energy by reducing heat flow through the building enclosure, reducing the need to burn fuel or use electricity to heat and cool the building. The good news is that, in addition to the other strategies considered for the flight and the wallpaper, here you can also maximize operational carbon savings to offset the initial embodied carbon input. And, unlike the discretionary nature of some flights and the often optional decision to use furnishings like wallpaper, heating and cooling are necessary for the functioning of almost all occupied buildings.Based on this example, you can consider building products with operational benefits, like insulation, as an "investment." It is appropriate to look at improving the building enclosure and understanding what the return on the investment is from a carbon perspective. As the comparison above demonstrates, if you have a limited supply of carbon to "invest", putting it into more roof insulation is a very smart move compared to "spending" it on a discretionary flight or on a product without use-phase carbon benefits, such as wallpaper.This means we should be careful not to measure products like insulation that save CO2e in the building use-phase savings only by their embodied carbon use, but by their total carbon profile. So, how do we calculate this?Putting It to the TestWe were curious to know just how much operational carbon roof insulation could save relative to the initial investment of embodied carbon required to include it in a building. To understand this, we modeled the US Department of Energy's (DOE) Standalone Retail Prototype Building located in Climate Zone 4A to comply with ASHRAE 90.1-2019 energy requirements. We took the insulation product's embodied energy and carbon data from the Polyisocyanurate Insulation Manufacturers Association's (PIMA) industry-wide environmental product declaration (EPD).To significantly reduce operational carbon, the largest carbon challenge facing buildings today, the returns on the investment of our building design strategies need to be consistent over time. This is where passive design strategies like building enclosure improvements really shine. They have much longer service lives than, for example, finish materials, leading to sustained returns.Specifically, we looked here at how our example building's roof insulation impacted both embodied and operational carbon and energy use. To do this, we calculated the cumulative carbon savings over the 75-year life of our model building. In our example, we assumed R-30 insulation installed at the outset, increased every 20 years by R-10, when the roof membrane is periodically replaced.In our analysis, the embodied CO2e associated with installing R-30 (shown by the brown curve in years -1 to 1), the embodied carbon of the additional R-10 of insulation added every 20 years (too small to show up in the graph), and the embodied carbon represented by end-of-life disposal (also too small to show up) are all taken into account. About five months after the building becomes operational, the embodied carbon investment of the roof insulation is dwarfed by the operational savings it provides. The initial and supplemental roof insulation ultimately saves a net of 705 metric tons of carbon over the life of the building.If you want to see more examples like the one above, check out PIMA's study, conducted by the consulting firm ICF. The research group looked at several DOE building prototypes across a range of climate zones, calculating how much carbon, energy, and money can be saved when roof insulation is upgraded from an existing baseline to current code compliance. Their results can be found here. Justin Koscher of PIMA also highlighted these savings, conveniently sorted by climate zone and building type, here.Support for Carbon Investment DecisionsSo how can you make sure you address both operational and embodied carbon when making "carbon investment" decisions? We've prepared a handy chart to help.First, when looking at lower-embodied-carbon substitutions for higher-embodied-carbon building materials or systems (moving from the upper-left red quadrant to the lower-left yellow quadrant in the chart), ensure that the alternatives you are considering have equivalent performance attributes in terms of resilience and longevity. If an alternative material or system has lower initial embodied carbon, but doesn't perform as well or last as long as the specified product, then it may not be a good carbon investment. Another consideration here is whether or not the embodied carbon of the alternative is released as emissions (i.e. as part of its raw material supply or manufacturing, or "cradle to gate" stages), or if it remains in the product throughout its useful life. In other words, can the alternative item be considered a carbon sink? If so, using it may be a good strategy.Next, determine if the alternative product or system can provide operational carbon savings, even if it has high embodied energy (upper-right yellow quadrant). If the alternative has positive operational carbon impacts over a long period, don't sacrifice operational carbon savings for the sake of avoiding an initial embodied product carbon investment when justified for strategic reasons.Last, if a product has high operational carbon savings and relatively low embodied carbon (lower-right green quadrant), include more of this product in your designs. The polyiso roof insulation in our example above fits into this category. You can utilize these carbon savings to offset the carbon use in other areas of the design, like aesthetic finishes, where the decision to use the product may be discretionary but desired.When designing buildings, we need to consider the whole picture, looking at building products' embodied carbon as a potential investment yielding improved operational and performance outcomes. Our design choices and product selection can have a significant impact on total carbon targets for the buildings we envision, build, and operate.Click these links to learn more about GAF's and Siplast's insulation solutions. Please also visit our design professional and architect resources page for guide specifications, details, innovative green building materials, continuing education, and expert guidance.We presented the findings in this blog in a presentation called "Carbon and Energy Impacts of Roof Insulation: The Whole[-Life] Story" given at the BEST6 Conference on March 19, 2024 in Austin, Texas.References:Architecture 2030. (2019). New Buildings: Embodied Carbon. https://web.archive.org/web/20190801031738/https://architecture2030.org/new-buildings-embodied/ Carbon Leadership Forum. (2023, April 2). 1 - Embodied Carbon 101. https://carbonleadershipforum.org/embodied-carbon-101/

By Authors Elizabeth Grant

September 18, 2024

Don't miss another GAF RoofViews post!

Subscribe now