RoofViews

Your Home

How to Reinvent Your Attic for Optimal Storage

By Stefanie Zinchiak

January 13, 2022

Attic design

Why Attics Get a Bad Rep

Attics get a bad rep. Hot, unfinished, dark spaces, often hard to access, filled with insulation, ductwork, and old family heirlooms make attics an undesirable space. And scary movies like The Grudge certainly don't make attics any more appealing. What a shame. Perhaps if more people understood the potential that is just waiting to be unveiled, we'd have a very different viewpoint on these underserved spaces.

Of course, attics come in a variety of shapes and sizes, which may make renovations a bit more challenging - but all the more rewarding as well. Some are accessed using a standard staircase, while others have pull down ladders (or no ladders at all!). Some attics have furnaces, ductwork and HVAC equipment. And some attics come partially finished with flooring, while others require you to step from beam to beam or plunge to your demise through sheetrock – yikes! Nonetheless, there are limitless possibilities to renovate your attic; you just need a little imagination and inspiration.

The Objective at Hand

Most homeowners associate attics with storage space, yet an unfinished attic and improper ventilation can wreak havoc on those precious heirlooms, childhood memories and holiday decorations. And, it's a dreaded task for most homeowners to drag themselves into the cluttered, dark attic space to search through an unending array of boxes only to find their most precious memories deteriorating from harsh conditions. So when it comes to attic renovations for optimal storage there are two objectives: (1) An aesthetically pleasing, clutter-free space that maximizes every nook and cranny and, (2) a properly ventilated space that will help ensure those long loved treasures (and your home!) stay in proper condition.

Laying the Groundwork

Sure, you're eager to scroll down to the inspirational images (we don't blame you!), but to achieve your ideal storage haven, it's imperative we address the harsh reality about your attic: it may be lacking proper ventilation. And whether or not you care about salvaging the castaways you store in the attic, ventilation plays an even larger role in the functionality and longevity of your roof system- and everyone cares about the roof over their head.

So what is attic ventilation, exactly?

Roof ventilation is about finding the proper balance of intake air vents and an exhaust system. The intake vents at the bottom of the roof allow external, cooler air in while pushing out the superheated air from the exhaust vents at the top of the roof. Notice in the diagrams, the blue arrows representing different locations for intake vents and the red arrows indicating the various exhaust vents that allow for heat and moisture to escape at the top. And while this is the general concept, it's wise to learn more about attic ventilation. If you're a visual learner check out this quick 2 minute video.

Why do I need attic ventilation?

When you shower, cook, or even just breathe you generate moisture within your home, and that moisture can find its way up to your attic. Moisture generated by both your daily routines as well as elements from the weather (i.e. humidity; rain), will accumulate in the attic if there isn't proper ventilation. This can cause a series of problems, including mold and mildew, not only in your attic but also in the interior of the home and eventually the heart-wrenching deterioration of your stored items -and even health issues. In addition, poor attic ventilation can cause an increased air conditioning bill during the warmer months due to your HVAC having to work harder, while also causing a higher heating bill in the cooler months, because of deteriorated insulation. Moreover, improper or nonexistent attic ventilation can cause costly roofing and structural problems. . With so many reasons why proper ventilation matters, it's important to check on yours.

If you're looking to discuss attic ventilation in your home, you can reach out to a contractor certified by GAF*.

Creating an Aesthetically Pleasing, Clutter-Free Space

Once you have addressed any ventilation issues and the attic is properly ventilated, it's time to get creative.

A first step is getting rid of unnecessary clutter. Becoming clutter free doesn't necessarily mean throwing things away. After all, that's why you're looking to optimize your attic space, right? And while you'll surely want to toss items that are damaged, deteriorating or no longer used, with the proper steps you can create an aesthetically pleasing, clutter-free space with simple solutions. Of course before we jump into those inspirational ideas we need to do a bit of housekeeping – literally.

Step 1. Remove everything from the attic. This will allow you to assess your belongings, discard what you no longer need and organize your remaining assets.

Step 2. Label everything – or at least the boxes. Once everything is organized and in its own boxes, put a label on the boxes that clearly spell out what's inside: think 'Christmas ornaments', 'Winter jackets', 'Billy's toys' and the list goes on. See 'Organization Tip #1' below for which boxes you'll want to use (hint: not cardboard boxes).

Organization Tip #1:

For optimal organization, use either clear plastic bins with different color lids or different color storage bins that have labels (i.e. Red for Christmas; Orange for Halloween; Pink for Heirlooms; Blue for Winter Coats; Green for Crafts; and so on). Unlike organic cardboard boxes which can grow mold and mildew from moisture, plastic bins will help protect your belongings from the elements. And, if you choose clear bins you will be able to peruse the contents of each box at a glance.

Photo credit: @myhome1projectatatime

Step 3. Assess the attic space. Now the fun and creative ideas can begin as you assess the space and create your ideal clutter free storage space. Begin with the flooring. If you only have beams filled with insulation in between, you'll want to consider flooring. You'll need about ¾" thickness of plywood to be nailed into the beams, covering the floors for adequate safety and storage purposes. Then look around your attic to determine the highest points of your attic and areas that are most accessible, which will help you outline your master plan. Overcoming those sloped walls and tricky corners is going to be your forte. See 'Organization Tip #2' below for ideas on how to create shelving and storage areas

Organization Tip #2:

Either purchase or create DIY custom shelving to fit in those awkward attic spaces. Get inspiration from the images below showing how one woman created her own very own shelving using OSB board (you can also use plywood) and 2x4s, or an example of store bought shelving that fits snugly along sloped attic walls.


The Inspiration

Surely you've seen renovations that completely transform dingy attic spaces into gorgeous bedrooms or office spaces, but for most of us renovating our attics to achieve an optimal storage space that is a bit more aesthetically pleasing is a realistic and attainable aspiration we can get excited about.

Inspiration #1:

This setup is created in more of a finished attic space, but you can see that with just a few creative pieces of white shelving, files, baskets and cabinetry the space was optimized with a clean look.

Photo credit: Songbirdblog

Inspiration #2:

Who doesn't love before and after photos? See how this savvy organizer transformed her unfinished attic into a holiday storage haven using metal shelves, wooden rods and clear storage bins.

BEFORE:

AFTER:

Photo credit: Worthing Court Blog

Inspiration #3:

If you have an attic with lots of trusses and rafters (those sloped beams that provide support for your roof), then here are 3 great options to utilize storage space between them.

  • Option #1: A 2-tier shelving system that can be built with a few 2x4s and plywood.

Photo credit: Tom Builds Stuff

  • Option #2: Place wire shelving directly through the trusses and secure to the beams. It doesn't get any easier than this and will keep your storage items off the insulation and floor beams.

Image credit here Image credit: LoftZone

  • Option #3: Using metal brackets and shelving, you can maximize the space between the trusses while keeping your boxes off the insulation and beams, like in the photo below.

Photo credit: Core77

Inspiration #4:

To utilize space alongside vertical beams, use vertical shelving tracks that allow you to hang shelves and rods to create a custom storage space, like in the image below.

Photo credit: Porch Day Dreamer

Inspiration #5:

If you're fortunate to have a wide-open space, then secure plywood along the beams for support and create wide shelves along the perimeter of your attic.

Once you've transformed your attic into a storage haven, you may decide to expand its capabilities to accommodate the more frequently used items in your life – without the dread and worry. And, you'll feel great about the functionality of your home when you've assessed and addressed any ventilation issues. After all, it's important to feel your best inside and out...so why shouldn't your home reflect that as well.

And with GAF having earned the Women's Choice Award as a 9 out of 10 customer recommended roofing product, you can feel more confident when your contractor uses GAF materials for your roofing and ventilation needs.


*Contractors enrolled in GAF certification programs are not employees or agents of GAF, and GAF does not control or otherwise supervise these independent businesses. Contractors may receive benefits, such as loyalty rewards points and discounts on marketing tools from GAF for participating in the program and offering GAF enhanced warranties, which require the use of a minimum amount of GAF products.

About the Author

Director, Consumer Engagement, Women's Choice Award Stefanie is the Director of Consumer Engagement at the Women's Choice Award and wears many hats, but among her favorite responsibilities is content writing for a variety of industry-specific brands, as well as publishing over 100 patient education healthcare brochures utilized by healthcare facilities. In addition to her marketing experience, Stefanie was a 6-time award-winning educator and school administrator. She resides in Coral Springs, FL with her husband, two young children, and her Shetland Sheepdog, where she enjoys reading, writing, swimming and the occasional full night's sleep.

Related Articles

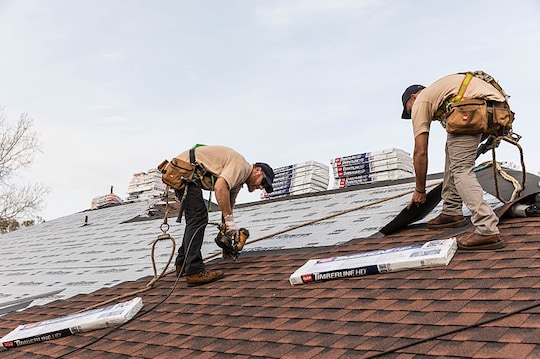
Two roofers installing GAF shingles.
Your Home

How Long Does It Take to Replace a Roof?

If your roof has been showing signs of wear and you've finally decided to replace it, you'll naturally want to know what to expect and how long the process will take. But simply asking a contractor "How long does it take to replace a roof?" won't always give you the same answer.While an asphalt shingle roof replacement on an average-sized home can often be completed in one to two days, many factors can influence how long the replacement actually takes. Here's a look at the steps involved in a roof replacement and the variables that can affect the timing.Securing an EstimateThe first step in any roof replacement project is meeting with your contractor. They'll assess your roof, secure measurements, and review material choices with you. Many contractors rely on technologies like aerial imagery and remote measurement services that allow them to deliver an estimate within a few hours or the next day.After reviewing your estimate and roofing system options, your contractor should have a good idea of how long the project will take (and how much it will cost) based on their past experiences.Accessing Your RoofOnce crews arrive at your home to begin work, they'll need to use ladders or scaffolding to get themselves, their tools, and the roofing materials onto your roof. Complex landscaping, closely situated neighbors, or even a fence around the property can make it more difficult and time-consuming to position dumpsters, stage materials, and dispose of waste.Having to move items around and prepare the space before work can begin can add hours to the front end, potentially causing the project to take longer overall. Accordingly, make sure your roof is accessible and your property is free of hazards before the crews arrive.Discovering Hidden Roof IssuesYour roof replacement includes removing the old roofing system, down to the plywood roof decking. This process is typically accomplished in a few hours. Once the wood decking is exposed, your contractor will be able to see if any water intrusion has caused it to rot.Damaged or rotting plywood will need to be replaced, which can add time to your roof installation—anywhere from a few hours to an extra day.Calculating Your Roof's Size and ComplexityIf your home has a steep pitch—generally greater than an 8:12 slope—the roofing crews will require specialized safety equipment, and they won't be able to work as fast as they could on a lower-pitched roof. Roofs that feature many intersecting planes, angles, and penetrations take longer, as these features require crews to cut more shingles during the installation, adding time to the job.Factoring in Weather on Installation DayIf rain is in the forecast, this could cause your roofing installation to take longer. If the morning weather is clear, but rain is expected in the afternoon, the crews may only complete part of your roof and have to return the next day to finish the installation.Roofers typically start work early in the day. But during cold weather, frost on the roof can make it dangerous. They'll have to take extra safety precautions or start working later in the morning after the frost is gone.All of these environmental factors can impact the roofing crews' ability to work. So, ask your contractor about contingency plans before work begins, and inquire how weather might push the completion date.Improving VentilationVentilation is critical to your roofing system's performance. It prevents moisture from becoming trapped in your attic, which can lead to interior damage to your home. If your contractor determines your home has poor attic ventilation, they'll need to correct that during the roof installation process, adding time to the project.So How Long Does It Take to Replace a Roof?No two roofs are the same, so the best answer to "how long does it take to replace a roof" will vary based on factors specific to your home and location. Start by asking your contractor for a project timeline, and inquire how they'll manage any issues that can cause delays, such as hidden damage or the weather.When you work with a GAF-certified roofing contractor, you can rest assured they have the experience and knowledge to keep your project on track, efficiently handling unexpected delays or other challenges.Interested in getting an estimate on a roof replacement? Get started with your project by finding a GAF-certified contractor*.*Contractors enrolled in GAF certification programs are not employees or agents of GAF, and GAF does not control or otherwise supervise these independent businesses. Contractors may receive benefits, such as loyalty rewards points and discounts on marketing tools from GAF for participating in the program and offering GAF enhanced warranties, which require the use of a minimum amount of GAF products. Your dealings with a Contractor, and any services they provide to you, are subject to the GAF Contractor Terms of Use.

By Authors Karen L Edwards

December 22, 2024

Una casa grande con tejas para techo oscuras
Your Home

Tejas GAF Reflector Series: las tejas reflectantes más oscuras del mercado

La línea más nueva de tejas asfálticas reflectantes diseñadas por GAF, Timberline HDZ® Reflector Series, puede brindarle a su hogar más protección contra la intemperie y un atractivo aspecto exterior.Las tejas para techado, disponibles en elegantes colores oscuros, crean una estética atractiva que puede usarse para cumplir con ciertos requisitos de códigos relacionados con la reflectancia. Esto es particularmente importante en California, donde los códigos edilicios estatales, como el Título 24, y las normativas locales, como el Código Edilicio Ecológico del condado de Los Ángeles, requieren una reflectancia específica en los techos para ayudar a conservar energía.A continuación le mostramos lo que debe saber sobre estas nuevas tejas reflectantes, incluida su tecnología exclusiva y el potencial para permitir ahorros en costos de energía.Características de las tejas Reflector SeriesLas tejas Timberline HDZ® RS tienen varios puntos fuertes que les permiten destacarse respecto de la competencia. Gracias a su diseño, las características de las tejas de techado mejoran la reflectancia y ofrecen protección adicional contra las algas y el viento.Gránulos EcoDark®Las tejas Timberline HDZ® RS cuentan con gránulos EcoDark®, una tecnología con una nueva fórmula que ofrece colores oscuros ricos y profundos sin perder reflectancia. Entre los colores disponibles se incluye carbón, que actualmente es el color más oscuro con alta reflectancia en California, y varias otras combinaciones, cada una con un aspecto completo y dimensional.Tecnología LayerLock®Las tejas asfálticas tradicionales tienen varias capas de material conectado con adhesivo o fijadores mecánicos. Con la tecnología GAF LayerLock®, las capas de tejas se fijan mecánicamente. Esto ofrece protección adicional contra el viento, que puede desprender las tejas del techo.Gracias a la tecnología, GAF puede afirmar que es pionero en otra cosa en la industria: ofrecer una garantía sin límite de viento máximo**.Cuatro beneficios de las tejas Reflector Series para propietariosLas tejas Timberline HDZ® RS le ofrecen varios beneficios.1. Cumplimiento de los códigos y reducción del costo de refrigeraciónEn California, las tejas RS pueden usarse para cumplir los requisitos de reflectancia solar de edificios residenciales altos, según se indica en el título 24, parte 6 del Código de Regulaciones de California de 2022 y el Código de Estándares Edilicios Ecológicos del condado de Los Ángeles. Ambos códigos fijan un índice de reflectancia mínima, denominado índice reflectivo solar (SRI, solar reflective index), que mide la capacidad de un material para reflejar el sol y la luz solar. Cuanto menor sea el valor de SRI (de 0 a 100), más caliente será un material bajo la luz solar. Cuanto mayor el valor, más frío será el material.Las tejas con un SRI más alto, como GAF Timberline HDZ® RS, reflejan más luz solar, ayudan a reducir la temperatura interna y la energía (y los costos) que se necesita para refrigerar su hogar.2. Colores oscuros y ricos que combinan con cualquier estilo o estéticaYa no tendrá que elegir entre colores oscuros, ricos y profundos, populares en la arquitectura moderna, y el cumplimiento de los requisitos de reflectancia. Además de ofrecer una opción en color carbón, el color de alta reflectancia más oscuro, los otros colores de la línea cuentan con mezclas de colores GAF High Definition® que le brindan a las tejas Reflector Series un aspecto dimensional similar a las tejas de madera.3. Protección contra algas verde-azuladasLas manchas de algas verde-azuladas, una cianobacteria llamada gloeocapsa magma, pueden reducir el valor de su hogar. Las tejas HDZ® RS incluyen la tecnología contra las algas GAF Time-Release, que utiliza cápsulas especialmente diseñadas impregnadas con miles de partículas de cobre. El cobre se libera de manera uniforme a lo largo del tiempo y evita el crecimiento de las algas durante muchos años. Gracias a esta tecnología, GAF ofrece una garantía limitada de protección contra las algas StainGuard Plus™ de 25 años*, que es especialmente beneficiosa en climas cálidos, húmedos y costeros como el de California.4. Garantía contra viento sin límite máximo de velocidad de vientoCuando se instala con la cantidad requerida de accesorios del sistema de techado GAF, la tecnología LayerLock® de las tejas Timberline HDZ® Reflector Series le permite a GAF ofrecer una garantía contra viento limitada WindProven™ de 15 años** sin límite máximo de velocidad de viento.Una opción elegante para los propietarios de CaliforniaSi vive en California, las tejas GAF Timberline HDZ® RS son una opción inteligente para cumplir los estrictos requisitos de reflectancia estatales y, al mismo tiempo, seguir el sentido estético y estilístico de la arquitectura moderna. Las características de las tejas le brindan protección adicional a su hogar y pueden reducir los costos de refrigeración, algo que puede suponer un ahorro para su bolsillo.¿Está listo para obtener estos beneficios en su techo? Comuníquese con el contratista de techado certificado por GAF*** más cercano para obtener más información.*La garantía limitada StainGuard Plus™ de 25 años contra decoloración provocada por algas verde-azuladas está disponible solo en productos vendidos en paquetes que incluyen el logotipo StainGuard Plus™. *La garantía limitada StainGuard Plus PRO™ de 30 años contra decoloración provocada por algas verde-azuladas está disponible solo en productos vendidos en paquetes que incluyen el logotipo StainGuard Plus PRO™. Consulte la Garantía limitada de tejas y accesorios GAF para conocer la cobertura y las restricciones completas.**La garantía limitada contra viento WindProven™ de 15 años en tejas Timberline® HDZ™ requiere el uso de fajas iniciales GAF, protección de cubierta de techo, cumbreras para tejas y barrera contra filtraciones o ventilación de áticos. Consulte la Garantía limitada del sistema de techado GAF para conocer la cobertura y las restricciones completas. Visite gaf.com/LRS para conocer los productos GAP elegibles.***Los contratistas inscritos en programas de certificación GAF no son empleados ni agentes de GAF, que no controla ni supervisa de ningún otro modo estas empresas independientes. Los contratistas pueden recibir beneficios, como puntos de recompensa de programas de lealtad y descuentos en herramientas de marketing de GAF, por participar en el programa y ofrecer garantías mejoradas de GAF, que requieren el uso de una cantidad mínima de productos de GAF. Sus arreglos con un contratista, y todos los servicios que le pueda ofrecer, están sujetos a los Términos de uso del contratista.

By Authors Dawn Killough

December 20, 2024

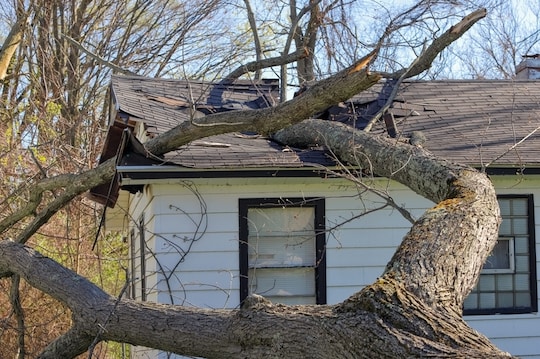
A house damaged by a fallen tree.
Your Home

Signs of Tree Damage to Your Roof and Prevention Strategies

If you have trees on your property, you're probably aware of their many benefits. They can boost your property's aesthetic appeal, create privacy, and provide shade to keep your home cooler. Trees can also protect your roof from ultraviolet rays and block wind, minimizing related damage.However, if trees aren't maintained, they can cause damage to your roof. Here are the signs to look for, what to do if a tree falls on your roof, and how to prevent tree damage to your roof in the future.How Nearby Trees Can Damage Your RoofYou're likely aware that the worst damage to a roof can occur when an entire tree falls on your home. This can happen during a severe storm or if an older tree is ill or damaged.However, one tree branch can cause plenty of structural damage, too. Even a small branch falling on or rubbing against your roof can scratch or dent its protective layers, especially if it's laden with snow or ice.And branches aren't the only culprits that can damage your roof. Fallen leaves, nuts, and needles from trees can accumulate, blocking your gutters and roof valleys. This creates an environment that absorbs moisture, leading to moss or mold growth—both of which can reduce your roof's lifespan. Ponding water from this debris can cause leaks over time.Overhanging branches can also create too much shade, exacerbating any moisture issues by making it challenging for your roof to dry. Additionally, branches that touch your roof create easy access for squirrels and other animals, potentially leading to intrusions and damaged roofing components.Signs of Roof DamageTo stop any issues from a tree over the roof from worsening, watch out for signs of roof damage. While a professional inspection can help pinpoint problems by taking a closer look at your roof, you can also perform an inspection from the ground.Look for any cracked, broken, scratched, or curled shingles. Also, note any missing shingles, especially after a windstorm. Check for moss, mold, or an accumulation of debris like leaves and needles. All of these issues can lead to leaks or larger problems down the road, such as structural damage.What to Do If a Tree Falls on Your RoofIf a large branch or entire tree has fallen and damaged your roof or siding, prioritize your safety. If you see any live wires, smell gas, or spot major water leaks, call your utility company right away to shut off your service. Evacuate everyone from your home, and call your insurance company. In most cases, the company will send a professional roofer to evaluate the damage.While you're waiting for the expert to arrive, document the damage by taking photos and video of any areas the fallen tree affected. Once the insurance company has approved your claim, hire a professional to remove the tree and repair the damage.While most homeowners insurance policies cover roof repairs from tree damage, your insurance company might deny your claim if it discovers you failed to do preventive maintenance.How to Prevent Tree Damage to Your RoofProactively addressing tree-related challenges can help you minimize potential roof damage, saving you time and money in the long run.Clear DebrisRemove leaves, twigs, needles, and nuts from your roof and gutters. Installing gutter guards can also help prevent debris from clogging them.Trim BranchesTrim any tree branches that are too close to your roof. Avoid having any part of a tree over the roof—there should be at least 6 feet between your roof and the tips of a tree's branches. If you can't safely trim branches yourself, hire a tree expert.Remove Dangerous TreesIf an arborist determines that more than one-quarter of a tree's limbs need pruning, you might have to cut down the tree before it can fall on your roof. Don't forget to check with local authorities regarding bylaws and protected tree species.Plant Trees at a Safe DistanceIf you're planting new trees, remember they'll grow large over time. So, select species appropriate for your property's size, and plant them about 20 to 30 feet away from your home.Prepare for the Next Storm with Expert HelpAs the saying goes, the best defense is a good offense. Before another storm can threaten the health of your home's roof, take proactive measures to prevent as much damage as possible.For more information about preventing tree damage to your roof, check out GAF storm and hurricane roofing resources. To enlist professional help in repairing roof damage or installing a fortified roofing system, reach out to a GAF-certified roofing contractor* in your area.*Contractors enrolled in GAF certification programs are not employees or agents of GAF, and GAF does not control or otherwise supervise these independent businesses. Contractors may receive benefits, such as loyalty rewards points and discounts on marketing tools from GAF for participating in the program and offering GAF enhanced warranties, which require the use of a minimum amount of GAF products. Your dealings with a Contractor, and any services they provide to you, are subject to the GAF Contractor Terms of Use.

By Authors Wendy Helfenbaum

November 25, 2024

Don't miss another GAF RoofViews post!

Subscribe now